|
|
Using MySQL
From NeoWiki
While NeoOffice 1.2 Alpha, NeoOffice/J 1.1 and OpenOffice.org/X11 do not include a separate database component like Microsoft Access, it is possible to use either program to connect to existing MySQL databases and enter or manipulate data, including creating detailed forms and reports. This article contains information on installing, configuring, and using a MySQL database with NeoOffice or OpenOffice.org/X11.
If you do not have a MySQL database, you can create a simple database in NeoOffice or OpenOffice.org/X11—or even use a Calc table if your needs are very simple.
Contents |
Enabling NeoOffice or OpenOffice.org/X11 to connect to MySQL databases
Using JDBC and Connector/J
Installation Overview
- Download Connector/J 3.1 or later from the MySQL website.
- The included README gives much information.
- The most important keypoints are:
- the class name of the JDBCdriver: com.mysql.jdbc.Driver
- the URL format: jdbc:mysql://host.domain/database_name
- For NeoOffice/J 1.1 and below, you will need a version of Connector/J (3.0) that supports Java 1.3.x, since that is the version of Java used in NeoOffice/J. NeoOffice 1.2 Alpha uses Java 1.4.2 and should use versions of Connector/J that support Java 1.4.2.
- Note: Connector/J 3.1 and, presumably, later versions are not Java 1.3.x compatible.
- The jar file location:
- for OOo/X11: you can put it where you want. To let OOo know, you shoud go to "Tools->Options" menu item. Then in the "security" pane, there is a place to add directories to classpath. Click on browse and find your jar file.
- for Neo: I had to put it in the <NeoOffice>/Contents/MacOS/classes folder to get it found. Didn't check with recent release if the previous classpath setting does work.
- FYI. I just tried adding the MySQL jar file using the Security pane in the Tools->Options menu item Neo/J 1.1 Alpha 2. After adding the jar file in that pane and restarting Neo/J, I successfully connected to my MySQL database.
- This works with Neo/J 1.1 final and newer. The former option is probably better for providing it to all users, whereas this is well suited for
- There is also an attachment (.sxw) to OpenOffice.org Issue 13753 which contains screenshots and a different location for placing the Connector/J file.
Detailed Installation for NeoOffice/J 1.1 and below
Parts of this tutorial are out-of-date and incorrect for NeoOffice 1.2 Alpha and later
- If you haven't already, install NeoOffice/J (I am using v1.1, released 2005-06-22) and MySQL (I am using 4.1.13-standard).
- Download Connector/J 3.0 from http://www.mysql.com and save it to the Desktop. (I downloaded v3.0.17, the tar.gz version).
- Extract the Connector/J jar from the tar.gz archive.
- Copy the .jar file to wherever you like (I chose ~/lib).
- Launch NeoOffice/J.
- From the NeoOffice/J menu, choose Preferences….
- On the left is a tree of items. At the very top is "NeoOffice/J". Indented and underneath is a list of other items. Click on "Security".
- This changes the panel on the right. At the bottom of the right panel is a "Java" section; click the "Browse" button in that section.
- This opens the "Select Archives" window. Make sure that there are no other Connector/J versions installed (e.g., 3.1) or they will make life messy. To remove them, click the jar file to select, then click Delete. Repeat as necessary. (Note: not all items here are necessarily Connector/J archives, use some caution).
- Click the "Add" button.
- Browse to the directory where you installed the Connector/J 3.0 jar file (in step 4). Select the .jar file and click the "Open" button.
- Click the "OK" button.
- Exit NeoOffice/J.
- Restart NeoOffice/J.
- From the Tools menu, select Data Sources...; this opens the "Data Source Administration" window.
- Above the panel on the left is a button that says New Data Source. Click it.
- In the right panel, select "MySQL" for "Database Type" and click "Apply".
- Click the "MySQL" tab at the top of the right panel.
- In the "Type of connection" section, select the radio button next to "Use Connector/J3".
- Set the "MySQL JDBC driver class" to: com.mysql.jdbc.Driver
- In the "General" section, change the non-grey part of the "Data source URL" to: localhost:3306/test
- Set the user name and check the password box, if required.
- Click the "Tables" tab at the top of the right panel.
- Fill out your password if necessary.
- Ensure that no error message appears and that there is an entry in the white box.
Configuration
With the above basic setup, the connection should work. Then you come to the fine tuning stuff: charset, etc...
There are additional pointers available in this thread on trinity on other MySQL configuration issues.
Using ODBC
mansky posts some steps for getting ODBC to work with MySQL and OpenOffice.org/X11 in this post on trinity; it also contains other OOo/MySQL pointers.
kervalen posts some steps for getting ODBC to work with MySQL and NeoOffice/J in this post on trinity.
More tips on ODBC in this thread.
Enabling NeoOffice to connect to an hsqldb database
This thread on trinity describes how to connect NeoOffice to an hsqldb database (hsqldb is used as the core of the Base component in OpenOffice.org 2.0).
Enabling NeoOffice to connect to an postgresql database
This bug has tips to help you connect to a postgresql database via JDBC using NeoOffice 2.0 Alpha.
Using the Database with your NeoOffice Documents
Using the Database

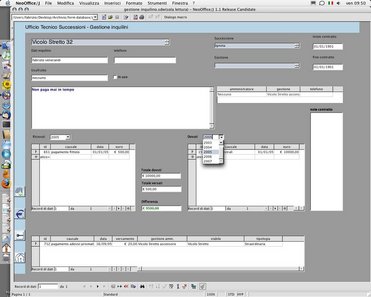
NeoOffice/J 1.1 (in Italian) forms and queries
interacting with a MySQL database (108 KB)
information on how to use the database
